GPS 3 Guidance x
USAGE GUIDANCE:
- Battery Life
- 2-Way Voice
- 2-Way Voice Settings
- Default Call Mode
- Alarm
- Alarm Settings
- Device status bar in app
- Preserving battery life
- Reminder Notifications
- Indoor Tracking
- Mapping school & indoor places
- Proximity with mobile hotspot
- Wi-Fi vs. GPS signal
- Connecting to a Wi-Fi network
- Forgetting a Wi-Fi network
- DEVICE GUIDANCE:
- Device Size and Weight
- Device Buttons
- Charging & turning on
- Powering on
- Charging indication
- Device status indications
- Device is on indication
- Screen blacked out
- TROUBLESHOOTING:
- Empty Timeline
- No Signal
- Advanced troubleshooting
- Removing the battery
- Activating a replacement
- Cannot connect to Wi-Fi
- Wi-Fi Networks not loading
- Handling water damage
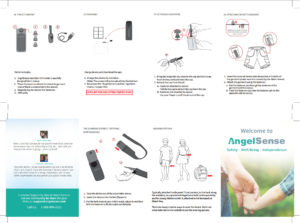
Getting Started
Here is a video to help with Getting Started with the AngelSense Guardian GPS 3
- Charge the device: It will take approximately 2 hours for a full charge of 12-16 hours. The device will power on automatically upon being plugged in.
- Download the AngelSense Application
- Log In to the AngelSense Application
- The device screen is blacked out on purpose, please refer to the status bar of the AngelSense app for the device status.
- Place near a window or take the device out for a drive to give it a chance to communicate.
And here is a video with more information on wearing options:
Battery Life

The battery can last 12 to 16 hours. The battery life can be impacted by poor cellular reception, being in unnamed locations, and use of Runner Mode and 1-Way & 2-Way Voice.
Note: Some GPS devices claim to have long battery life but they are using standby mode to conserve battery life. We do not use standby mode mode because it increases the likelihood that your Angel would not be able to be found in the case of an elopement. This is because it is not effective for keeping the child safe by querying the GPS for its location after waking up from standby. This is not reliable. The location is highly inaccurate in standby mode. AngelSense uses ONLY continuous monitoring and AngelSense patent pending power management algorithms assure longer battery life with continuous monitoring.
2-Way Voice
You can talk to your child at any time, without them needing to “pick up” or click anything!
In addition to all the AngelSense features you know and love, you can:
Instruct your child to stop, avoid a road, or stay away from any potential threat
Help your child transition smoothly between places and activities during the day
Give them more independence, guide or calm them down, and easily stay connected
You can authorize an unlimited number of users to call your GPS 2 device.
See who’s called your Angel today
During an Emergency you can combine Tracking, 2-Way Voice (AngelCall), and the Alarm feature for help with finding your lost child
Set a Default Call mode for each user so they can dial the device directly, without having to use the app, and it will either use 1-Way Voice (Listen-In) or 2-Way Voice automatically. Grandparents can call just to say hi!
We suggest speaking loudly, clearly, and slowly, as the device is typically secured inside of clothing.
- Click the Voice menu on the bottom when viewing your Timeline.
- Then, choose 2-Way Voice for a two-way conversation. The dialer will pop up with the device’s phone number. Select “Call”. (You can configure the Settings in your Menu. See: 2-Way Voice Settings)
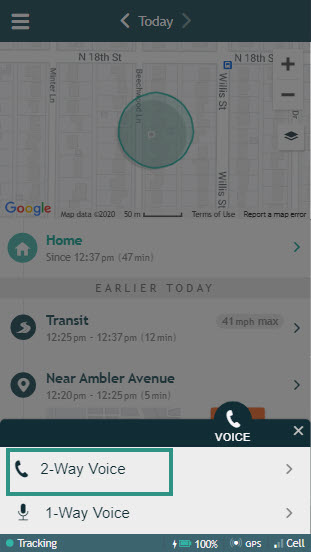
Note: During calls, the device cannot transmit GPS data and thus if are on a call (1-Way Voice or 2-Way Voice) with the device throughout the entire transit, the system will miss the transit.
- Back to Top
2-Way Voice Settings
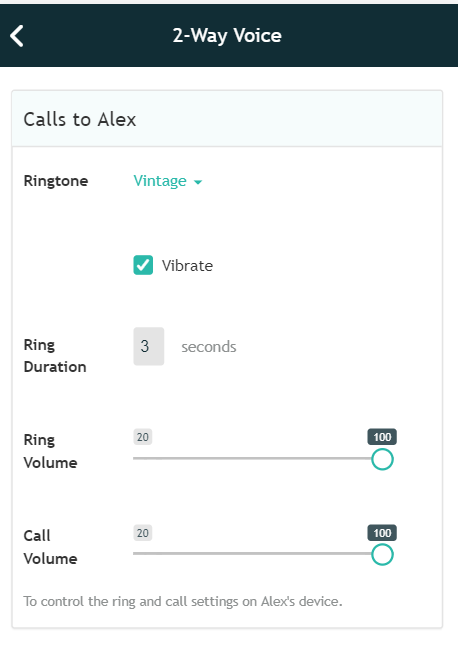
2-Way Voice (AngelCall) includes a rich set of options to control the experience when you call, to adjust to different children and sensitivity levels.
We suggest speaking loudly, clearly, and slowly, as the device is typically secured inside of clothing.
- Ringtone: The ringtone sound on the device when you call.
- Vibrate: Ability to have the device also vibrate when it rings to alert your child to the incoming call.
- Ring Duration: How long you want the device to ring before automatically answering.
- Ring Volume: The volume of the ringtone when it rings. A louder ringtone can ensure your child is alerted to your incoming call.
- Call Volume: The device’s speaker is turned on automatically and in this setting you control its volume during the call. It is suggested to keep the call volume at 100% to help your child hear you speaking to them.
This can be accessed from your app’s main Menu on the left hand side by clicking on Settings and Voice & SOS.

Default Call Mode
You have the option to set up the default call mode for Guardians! This can be used when a Guardian calls the device’s phone number directly (not through the app).
You can determine whether the device rings and starts a two-way call with 2-Way Voice (AngelCall) or silently with 1-Way Voice (Listen-In). For example, Grandparents can have the device’s phone number and simply call just to say “Hi”!
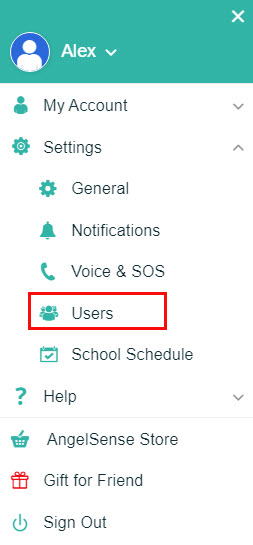
- Go to your app’s Menu on the left hand side and click “Settings” and “Users”.
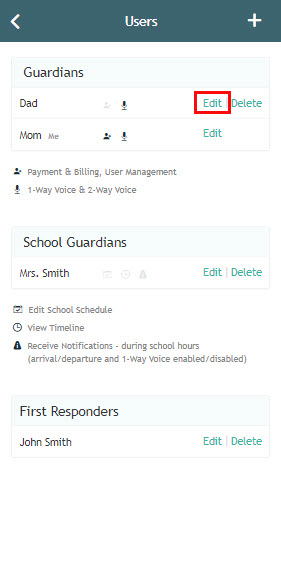
- Select the Guardian you would like to Edit by clicking the pencil icon next to their name.
- Make sure that they have the option to use 2-Way and 1-Way Voice.
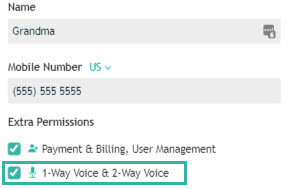
- Choose which device default call mode you would prefer for that Guardian so that when they call the device directly, not using the AngelSense app, the call will either go through as an 2-Way Voice or 1-Way Voice and Save.
Alarm
The alarm feature is designed to help you locate your child when nearby in a crowd, indoors, or hiding.
- Go to the Tools Menu on the bottom and then click on Alarm.
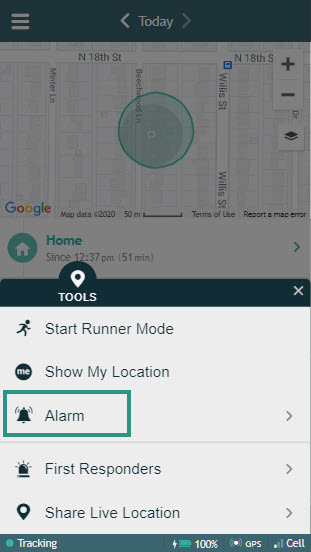
- Select whether you would like to use the “Loud Alarm” or the “Soft Alarm”. (You can configure these alarms in your Menu. See Alarm Settings)
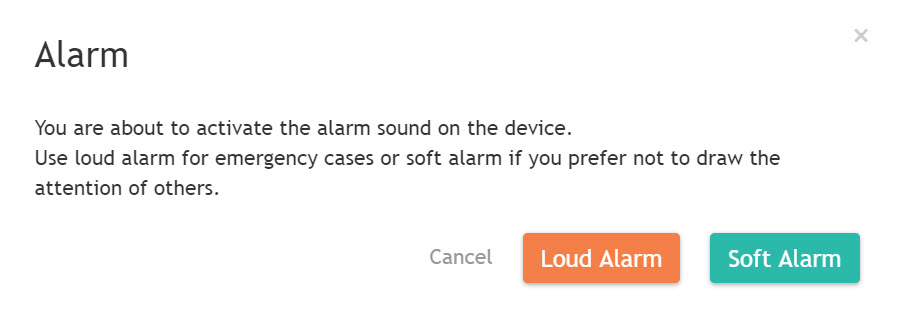
- Upon selecting the alarm, the tone selected will play on the device for the set duration or until you disable it by clicking on “Stop Alarm”.
Alarm Settings
The Alarm feature is designed to help you locate your child when nearby in a crowd, indoors, or hiding.
Alarm Settings include:
- Ringtone: The ringtone sound on the device when you press the Alarm.
- Duration: How long you want the ringtone to sound before automatically stopping
- Volume: The volume of the ringtone when it sounds. A louder ringtone can ensure you can hear it.
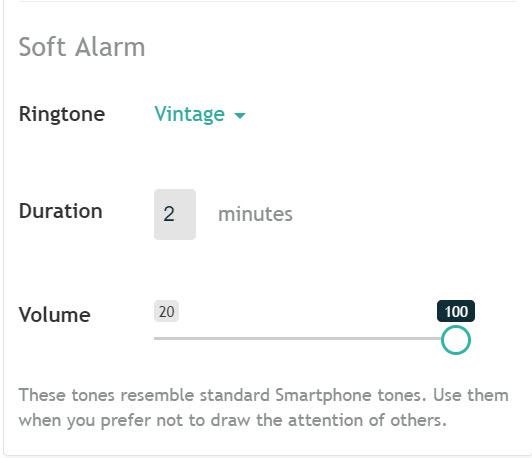
Soft Alarm: These tones resemble Smartphone tones. Use them when you prefer not to draw the attention of others.
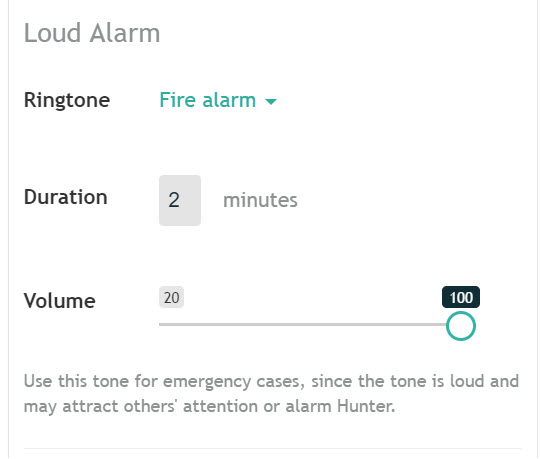
Loud Alarm: Use this tone for emergency cases, since the tone is loud and may attract others’ attention or alarm your child.
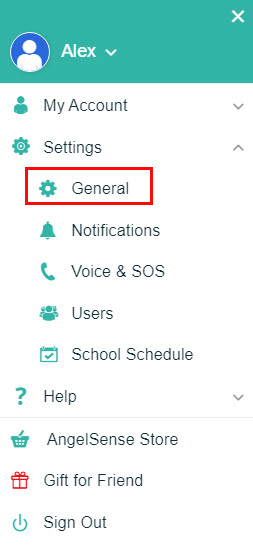
This can be accessed from your app’s main Menu by clicking on Settings and General.
- Go to the Tools Menu on the bottom and then click on Alarm.
 Back to Top
Device status bar in app
At the bottom of the app window there is a status bar.
The status bar displays the status of the AngelSense Guardian device. The app receives periodic updates from the device.
In app version 1.7.0 and above, the status bar is shown as below:
![]()
- At the left of the bar there is an indication for the quality of the connection with the device:
- Tracking: device is communicating and is updating as expected

- No Signal: No updates from the device, most likely due to lack of cellular coverage or due to the device running out of battery.
 In case of poor signal and delayed updates the time of the last update would be indicated, e.g. 27 minutes ago
 Battery indicator: This shows the percentage of battery life remaining.
  See: Battery LifeGPS accuracy indicator: indicates the quality of GPS reception and thereby the accuracy of the GPS reporting:
- 3 bars indicate very high accuracy, typically outdoors

- 2 bars indicate normal accuracy

- 1 bar indicates low accuracy

- 3 bars indicate very high accuracy, typically outdoors
In app version 1.7.0 and above, the GPS reception is indicated as below:
- Indicates very high accuracy, typically outdoors

- Indicates normal accuracy

- Indicates low accuracy

- Cellular reception level – indicates the quality of Cellular reception:
- 2-3 bars indicate normal reception levels


- 1 bar indicates poor coverage and the device may stop communicating

- 2-3 bars indicate normal reception levels
In app version 1.7.0 and above, the cellular reception is indicated as below:
- 2-3 bars indicate normal reception levels


- 1 bar indicates poor coverage and the device may stop communicating

- Note: since the status bar shows the last information sent by the device, the CELL indicator cannot reach zero bars (which state no signal). Instead, a status of no signal is indicated by “No Signal” line in the schedule as well as the status bar.
Preserving battery life
To preserve battery life:
- Name places to assure power saving is activated
- Assure place borders are large enough, e.g. to include all of the school’s buildings
- Use “Runner Mode” and “1-Way/2-Way” moderately
- Connect to Wi-Fi
- Leave the device charging until you are ready to use it
Some more About the battery:
- The battery can last up to 12 – 16 hours with continuous monitoring after a full charge (about 2 hours).
- The battery life can be impacted by poor cellular reception, being in unnamed locations, and use of Runner Mode and 1-Way & 2-Way.
Note: Keeping the app open as well as receiving notifications do not affect the battery usage of the device.
Reminder Notifications
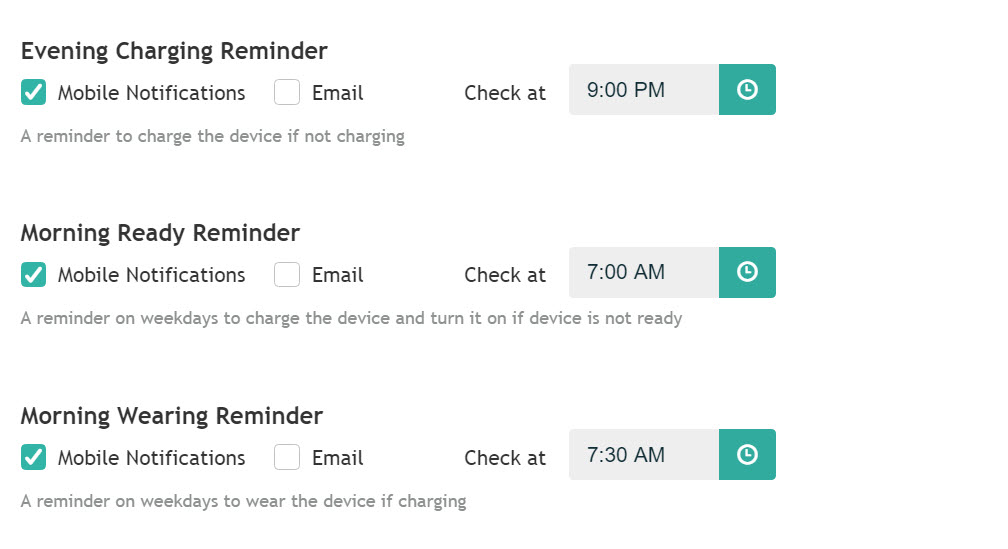
You have the option to receive courtesy reminder notifications.
- Evening Charging Reminder: A nightly reminder to charge your device. (Monday-Sunday)
- Morning Ready Reminder: A morning reminder to charge the device and/or turn it on if it is not ready. (Monday-Friday)
- Morning Wearing Reminder: A morning reminder that is sent if the device is still charging, reminding to unplug and send with your child. (Monday-Friday)
- Go to your Menu on the left hand side and click “Settings” and then “Notifications”.
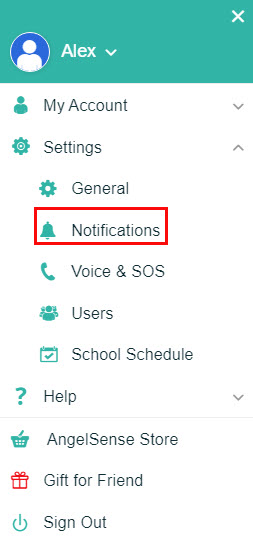
- Under “Notifications” you will have the option to update which notifications you would like to receive and also the times you would like to receive them.
- Update your notifications, press save, and you’re done!
Indoor Tracking
Indoors, GPS technology is ineffective, as line of sight to satellites is required (general GPS limitation).
AngelSense provides different tools to overcome these limitations, as described below.
- Tracking the entry point into an indoor location
- AngelSense’s frequent updates during transit show you the trail and entrance point to the indoors location.
- 1-Way Voice (Listen-In)
- 1-Way Voice to your child’s surroundings, sometimes a voice can be a good clue to their whereabouts.
- To pinpoint your child’s location, you can call your child out loud and ask another caregiver to listen. As you get closer to your child your voice will sound louder.
- 2-Way Voice (AngeCall)
- 2-Way Voice gives you the ability to call your child and have a two-way conversation, allowing you to calm down your child or have your child describe their surroundings if they are able to do so.
- Alarm
- Using the “Alarm” feature is designed to help you locate your child when nearby in a crowd, indoors, or hiding.
- Wi-Fi
- Search using Wi-Fi is designed to help you locate your child indoors by using nearby WiFi hotspots.
NOTE: The GPS 1 device does not support Wi-Fi.
- Tracking the entry point into an indoor location
Mapping school & indoor places
Indoors, GPS technology is ineffective as line of sight to satellites is required (general GPS limitation). AngelSense provides different tools to overcome these limitations.
Our AngelSense Guardian GPS 3 device also supports Wi-Fi-based locations. In large indoor places with good Wi-Fi coverage this may provide additional hints to the child’s exact location.
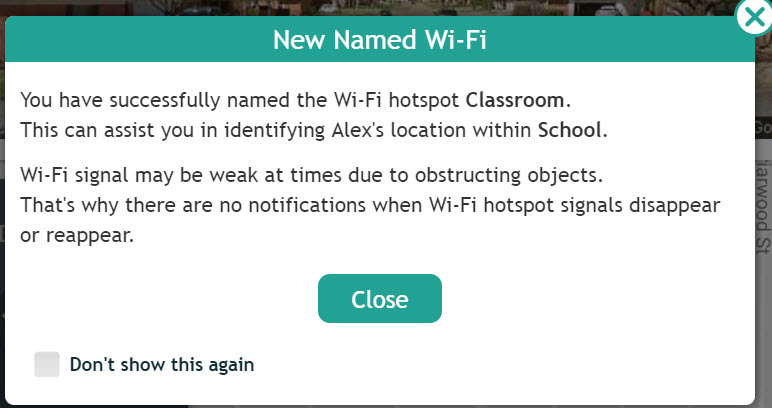
At the School location e.g., you could name Wi-Fi networks in order to get an idea for the potential area of school the child is located. (ex. office, classroom, etc…). This mapping is done once and then you can enjoy the insights of your child’s location within school.
To do this mapping you need to know where your child is currently e.g. by using the voice feature or knowing their itinerary.
You can then name the first hotspot in the list (the strongest one) so that the next time your child is near that hotspot, you will know the location.
Note: You are not connecting to these networks, only detecting their location relevant to the device.
Naming Wi-Fi networks:
Select the pencil icon next to the Wi-Fi network you wish to name and enter the name.
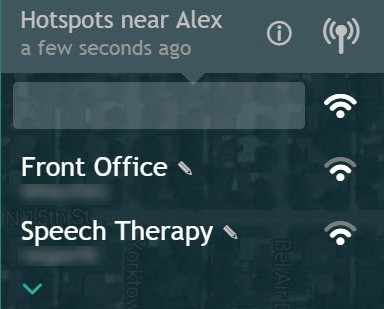
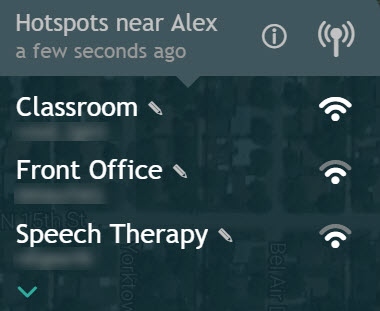
This Wi-Fi network is now named
When searching for your child in a mall, for example, we would recommend the following:
- Select the Menu on the right hand side and click on “Indoor Search”

- The system will show you the Wi-Fi hotspots near your child. The names of the strongest networks in the list can assist in finding your child. For example, “H&M store” as below, indicates your child is likely near or inside the H&M store.
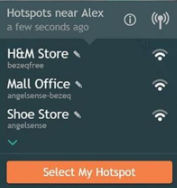
- You can also turn on your own Mobile Hotspot to get a sense for your proximity to your child.
The WiFi networks’ name and signal strength are available without requiring you to be connected to them. These networks are not being used for communication purposes so connection is not required. The networks are only used to determine your child’s location.
NOTE: The GPS 1 device does not support Wi-Fi.
Proximity with mobile hotspot
The GPS 3 device supports the option to locate your child indoors using Wi-Fi.
One of the options is to get a sense for your proximity to your child by turning on your mobile hotspot. The app shows the hotspots near your child and therefore it will also show your mobile hotspot if you are nearby. The signal strength is an indication for how close you are to your child, unless there is a wall or other barrier between you.
We recommend selecting your mobile hotspot at the bottom of the networks list to make sure it is always visible. This is best done in advance, while at home with the device:
- Turn on your mobile hotspot (see below).
- Choose “Select my Hotspot”
- Choose the Wi-Fi network that is your Mobile Hotspot
- Name this Mobile Hotspot so that you can recognize it in the future (ex. My Hotspot)
iOS:
- Open the Settings app, then select Mobile Data. (In iOS 10. In some older versions of iOS you just select Mobile.)
- Tap Personal Hotspot, and set Personal Hotspot to On. (Tap the slide so it turns green.)
- If Wi-Fi and/or Bluetooth are off, iOS will ask if you want to turn them back on. Turn them on.
- Tap ‘Wi-Fi Password’ and enter a suitable password. (This isn’t related to your Apple ID or usual Wi-Fi connection.)
- Check the name of the hotspot listed under “To Connect Using Wi-Fi” so you will recognize it.
Android:
(Android 6.x) Settings –> Wireless & Networks –> More –> Tethering & Portable Hotspot –> Set Up Wi-Fi Hotspot
(Android 5.x) Settings –> Tethering & Mobile Hotspot –> Mobile Hotspot
NOTE: The GPS 1 device does not support Wi-Fi.
Wi-Fi vs. GPS signal
When there is no GPS signal (such as indoors) and the location is Wi-Fi based instead, it will show Wi-Fi on the status bar. This does not mean that it is connected to Wi-Fi, only that the location is Wi-Fi based.

NOTE: The GPS 1 device does not support Wi-Fi.
Connecting to a Wi-Fi network
The GPS 3 device offers a feature allowing you to connect your device to Wi-Fi networks!
**WiFi is useful to track indoors when there is no GPS but it is not useful (in its current implementation) to communicate with the device when there is no cellular coverage.
Connecting to your home network is essential to enable upgrades with new features and bug fixes for your device software. If your device is at home and connected to the charger, but not connected to Wi-Fi, there will be a pop-up reminder in the app to connect to your Home Wi-Fi, so that you can receive these updates for your device.
You could also connect to networks in places where there is poor cellular reception to assure continuity of monitoring.
To connect to Wi-Fi networks:
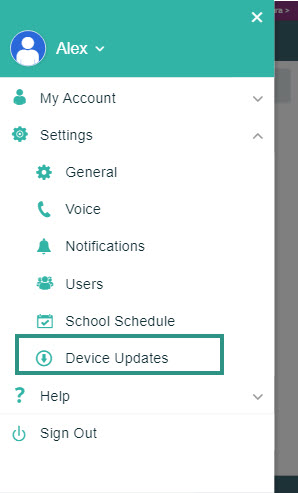
- Go to your Menu on the left hand side and click “Settings” and “Device Updates” wp-image-977658″ src=”https://www.angelsense.com/wp-content/uploads/2019/10/Device-Updates-GPS-2-1.7.0.jpg” alt=”” width=”241″ height=”399″ />
- A list of nearby Wi-Fi networks will come up
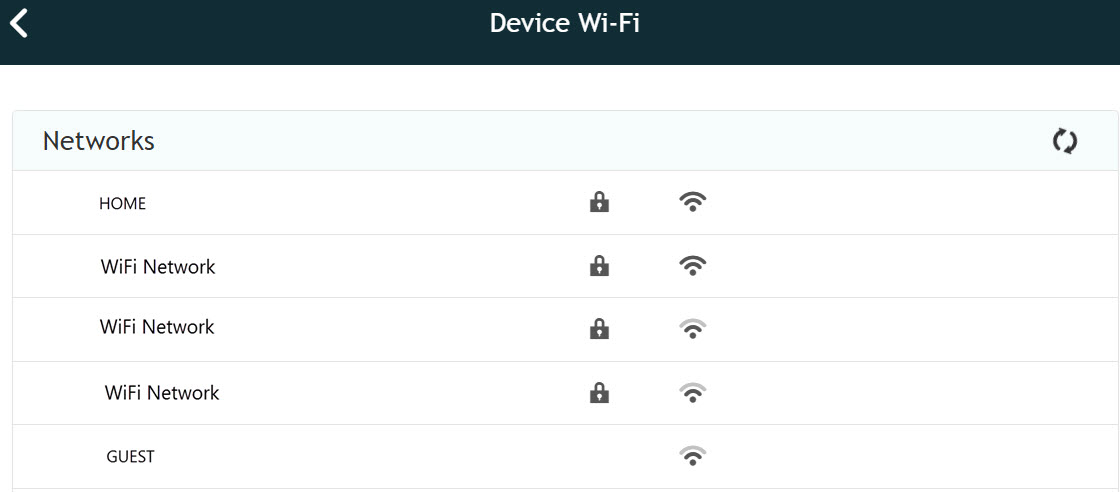
Connecting to an open network:
Some Wi-Fi networks do not require a password and will not have a lock icon beside them. To connect to these you would:
- Click on the network you want to connect to. It will attempt to connect

- Once connected, that network will have a check mark next to it and will connect to it automatically in the future

Connecting to a secured network:
For a Wi-Fi network that does require a password, has a lock icon beside it, you would:
- Click on the network you want to connect to
- Put the password into the box that pops up
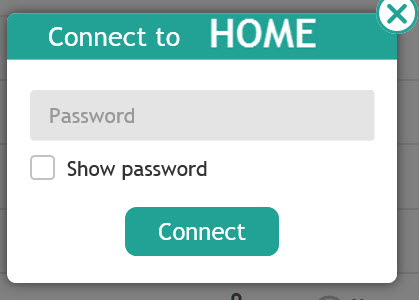
- Press “Connect”
- It will then connect as described above for open networks
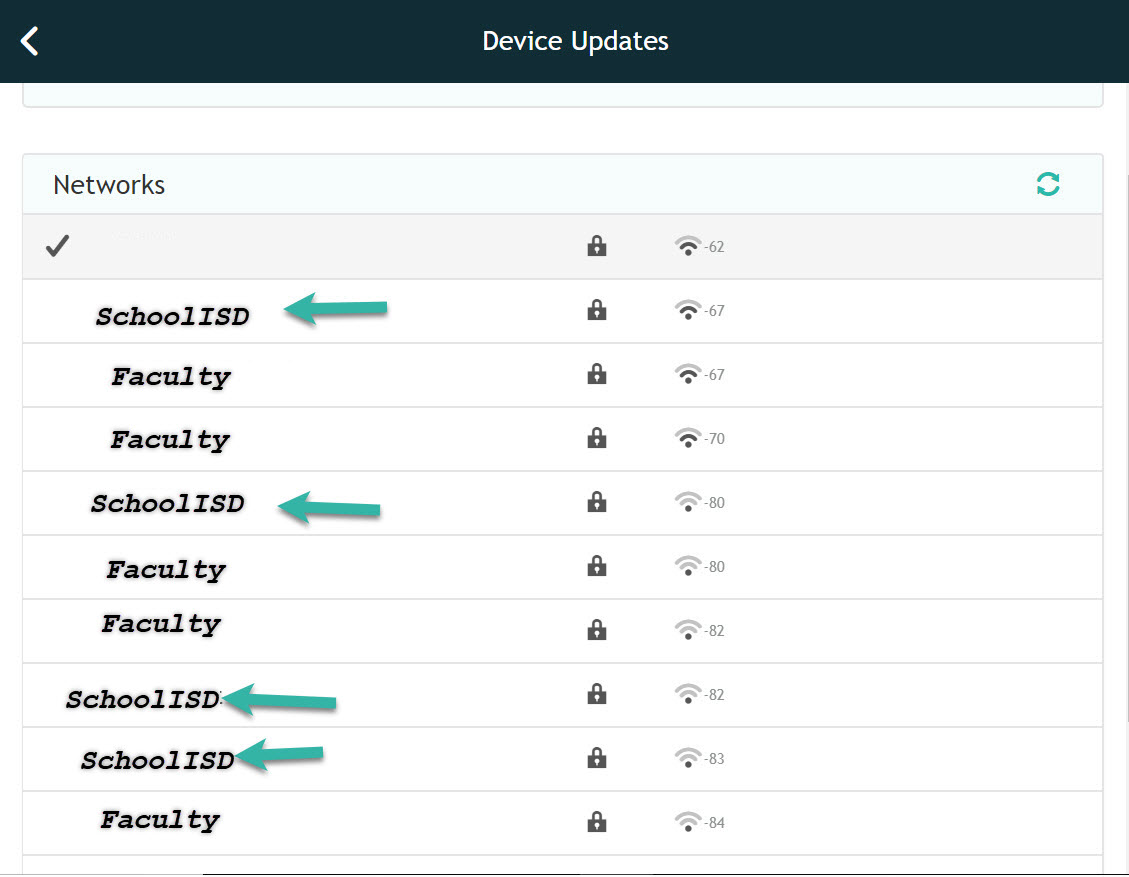
NOTE: The device may not automatically connect to WiFi networks with the same name (SSID) and password at a location. We suggest that you connect to each instance of the location’s WiFi showing in your app. (Example, at a school where all WiFi networks are named the same, such as ‘SchoolISD’)
NOTE: The GPS 1 device does not support Wi-Fi.
Forgetting a Wi-Fi network
If you want the device to no longer be connected to a Wi-Fi network:
- From your Menu on the left hand side, click on “Settings” and “Device Updates”
- Click on the network that is checked

- Click “OK” when the pop up window asks “Are you sure you want to forget?“
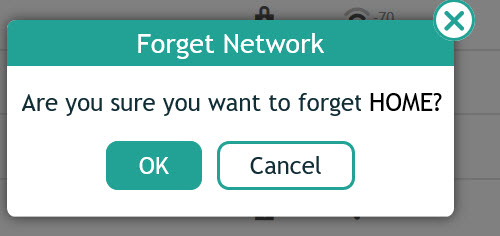
- The device will “forget” the password for this network until you enter it in again.
NOTE: The GPS 1 device does not support Wi-Fi.
Device Size and Weight
Size: 3.6 in x 1.7 in x 0.5 in
Weight: 2.1 oz

Device Buttons
The buttons are currently not in use, except for the on/off button for powering on and the volume buttons when Troubleshooting.

- Select the Menu on the right hand side and click on “Indoor Search”
Charging & turning on
The GPS 3 device is charged with a standard USB charger. It takes about 2 hours to recharge the battery. The device automatically powers on when it is plugged in.
To charge the battery:
- Connect one side of the USB charging cable to the wall charger and the small connector to the device.
- Charge the device near a window with good cellular reception, so that data can be regularly transmitted to the app.
- A couple of minutes after starting, the “Device is Charging” message should sound and you should see the message on the screen: “Screen will black out when unplugged. New User? Download AngelSense app on your mobile to get started.”
To verify the device is charging you can also check the status bar in the app. When the device is charging, the lightning bolt appears next to the battery, and the battery is colored green.
Note: If the device is already on it will restart, to prevent your child from turning it off. Pressing the power button will not turn off the device, only restart it.

Powering on
- The device is charged with a standard USB charger. It takes about 2 hours to recharge the battery. The device automatically powers on when it is plugged in.
- To charge the battery:
- Connect one side of the USB charging cable to the wall charger and the small connector to the device.
- Charge the device near a window with good cellular reception, so that data can be regularly transmitted to the app.
- A couple of minutes after starting, the “Device is Charging” message should sound and you should see the message on the screen: “Screen will black out when unplugged. New User? Download AngelSense app on your mobile to get started.”
- The power button is marked on the sleeve so that you can keep the device in the sleeve.
- If the device is already on and the power button is pressed it will restart, to prevent your child from turning it off. Pressing the power button will not turn off the device, only restart it.
Note:
- The device’s charging port is not under warranty.
- We recommend that an adult connects the device to a charger, and not a child.
- Attach the charger gently.
- Connect and disconnect the cable in a straight movement without wiggling.
- We suggest to keep the device charging when not in use. It is best to keep the device charged instead of letting the battery run out.
Charging indication
When you plug the device into the charger you will get an audible message saying “Device Is Charging” and you will see the message on the screen: “Screen will black out when unplugged. New User? Download AngelSense app on your mobile to get started.”
You can also check the status bar in the app. When the device is charging, the lightning bolt appears next to the battery, and the battery is colored green.

If you do not get these messages, verify that your audible indication volume is turned up.You do have the option of turning this audible indication up or down as well as allowing or preventing it from vibrating upon being plugged in.
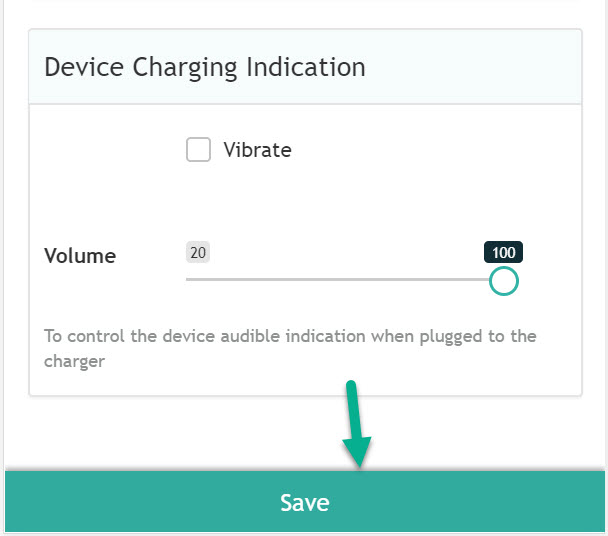
1. Go into your Menu and click “Settings” and then “General”
2. Scroll down to the “Device Charging Indication” section. Here, you have the ability to allow the device to vibrate upon being plugged in and to adjust the volume for the audible indication of charging. Then, Save and you’re Done!

- Back to Top
Device status indications
The device status is only available when the device is powered on and put to charge.
Plug it in and verify:
- You hear the audible message of “Device is charging”. (Please verify the volume is turned up)
- You see the message on the screen: “Screen will black out when unplugged. New User? Download AngelSense app on your mobile to get started.”
The device automatically powers on when plugged in.
Device is on indication
- ou can tell the device is on in one of two ways:
- Check the status of the device to assure the device is communicating and updating in the app
- Plug it in and verify:
- You hear the audible message of “Device is charging”. (Please verify the volume is turned up)
- You see the message on the screen: “Screen will black out when unplugged. New User? Download AngelSense app on your mobile to get started.”

The device automatically powers on when plugged in.
Screen blacked out
By design, the screen is blacked out to prevent the battery draining from the lit up screen, to prevent children from wanting to play with it, and to prevent accidental alterations to the programming which could render the device useless.
When the device is plugged in you will see the message on the screen: “Screen will black out when unplugged. New User? Download AngelSense app on your mobile to get started.”
If a situation requires that the screen must be unlocked, a customer care agent will assist you.
Belt
The AngelSense accessory belt is made of a “Drill” (a weaved technique) fabric, 60% Polyester, 40% Cotton; which gives a good balance between softness and durability.The belt can be worn several different ways.
There is no right or wrong way to wear it, just however your child is most comfortable. It can be worn through belt loops, resting on top of the belt loops, or even under clothes against the skin to name some options.
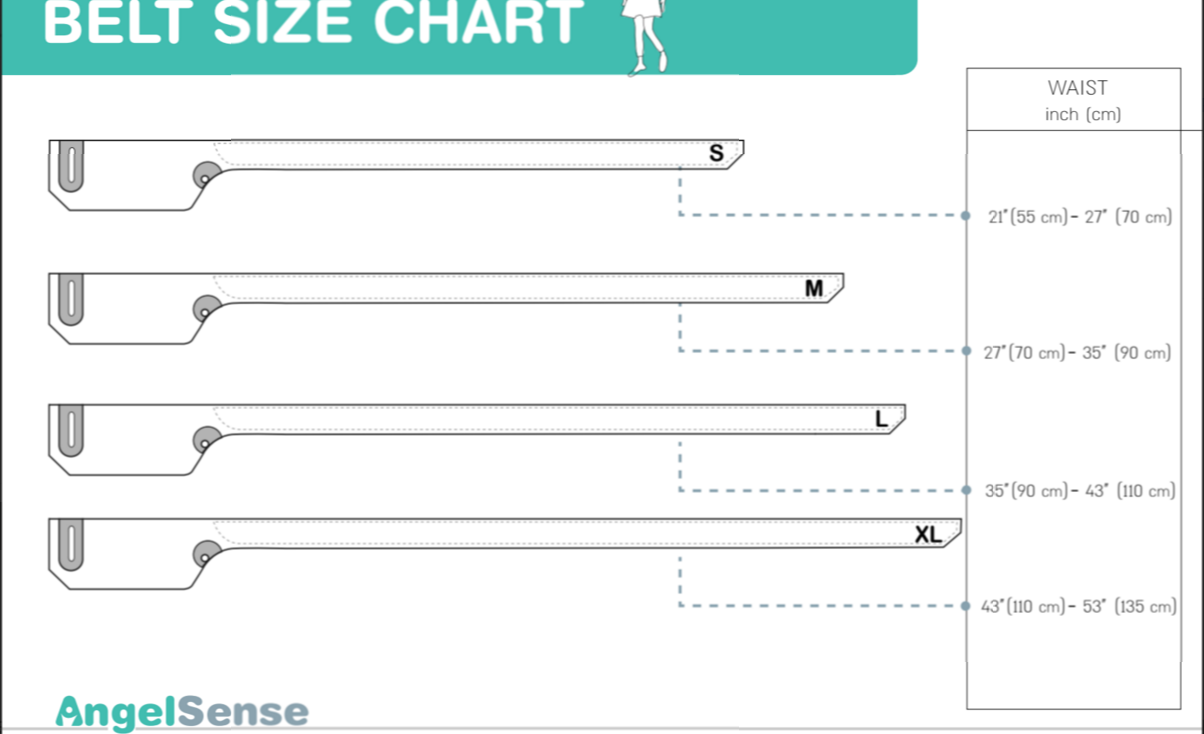
*There is currently no toddler size
Please remember when ordering to check to make sure you are choosing the correct belt model for the device you have.
The belt, wearing accessories, replacement devices, as well as voice minutes can be purchased in the AngelSense Store by Primary Guardians, which is available from the app’s main Menu, under “My Account”:
Note: Accessories are nonrefundable and not returnable, including the undershirt and belt. Please make sure you use the size charts and measure carefully. Accessories may only be purchased by current customers.
Wearing accessories
The AngelSense GPS 3 device comes with a protective sleeve that is used to secure it to clothing and to prevent tampering with the device.
The sleeve comes with tamper-proof fasteners and a magnetic key to detach the fasteners.
Here is a link with a great overview of all of the accessories: AngelSense Wearables
Additional Accessories may be purchased from your AngelSense app. See: Buying accessories
Note: Accessories are nonrefundable and not returnable, including the undershirt and belt. Please make sure you use the size charts and measure carefully.
AngelSense Blog:
How Can Kids with Special Needs Wear a Personal GPS Tracker?
Wearable personal GPS trackers usually come in the form of GPS bracelets and watches, because what could be more convenient than wearing a lightweight gadget around your wrist, right? Wrong! Read more…
Waterproof
The device is not waterproof. However, we do provide Waterproof accessories.
The device’s warranty will unfortunately be void if the device has water damage, but there are some steps that you can take to try and salvage it. See: Handling a device that gets submerged in water
Securing device to clothing
The AngelSense GPS device was designed for daily use by children with high sensory sensitivity. The device can be attached inside your child’s pocket, to the back along the waistline, or any other secure place. There is also a specialized belt and undershirt you can purchase.
It is best to attach the device before your child puts on their clothing.
The strong magnetic fasteners are designed to prevent the child from removing or tampering with the device.
To attach the device to a child’s clothing, perform the following steps:
- Use the magnetic key to remove the fasteners from the protective sleeve (we recommend attaching the fasteners to the sleeve when not used to avoid losing them). See: “How do I detach the device from my child’s clothes?”
- Insert the device into the protective sleeve. Ensure that the charging port of the device is aligned with the slot on the sleeve.Note: the AngelSense sleeve is designed to fit snugly this way on purpose to assure it will maintain its orientation. The device can be kept inside the sleeve and thus the insertion of the device into the sleeve is not a frequent action.
- Attach the sleeved device to the clothing.
- Insert the pin of the fastener through the clothing and the protective sleeve.
- Place the cap of the fastener on the pin, to secure the fastener to the garment.
Additional Accessories may be purchased from your AngelSense app. See: Buying accessories
Watch: Wearing AngelSense Options
Empty Timeline
To start showing the device location in the app charge your device and try taking the device out in transit at least 1.5 miles outdoors away from charging location. This way the device can fully connect to local towers and GPS in the area.
If you still do not see the device location in your app it is likely due to poor cellular coverage. Contact AngelSense to receive the device that best suits your area.
See detailed instructions below.
Charge by a window:
- Connect the device to the charger. A full charge takes two hours.
- The device powers on when plugged in and you will get an audible message saying “Device is charging”.
- If there is no cellular coverage the audible message would be “Device is charging, there is no cellular reception”. In such case the app would not be updating. Take the device outdoors to check if cellular reception improves.
- GPS is ineffective indoors but typically after some time by a window it will identify your home. You can see the status of the GPS reception in the status bar of the app
Take the device outdoors to see it in action:
- You should be able to see your route on the map.
- If the app is not updating, it is likely due to poor cellular reception. Contact us and we will gladly replace your device with one that best suits your area.
- Make sure the device is outdoors or near a window for proper GPS reception. Try taking the device out in transit at least 1.5 miles outdoors away from charging location. This way the device can fully connect to local towers and GPS in the area.
No Signal
When the app does not get location updates from the device for at least 30 minutes, the app shows “No Signal” in the status bar and the timeline as shown below.
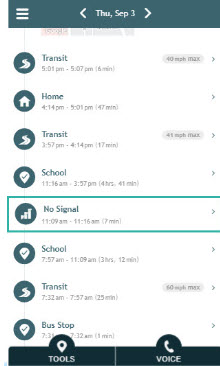
All monitoring features are unavailable, including location updates to the app, mobile notifications, and 1-Way Voice (Listen-In) & 2-Way Voice (AngelCall).
Potential reasons:
- No cellular coverage
- The device is in a place that blocks cellular reception (e.g. some schools block cellular reception)
Troubleshooting:
- Make sure your app is showing the most up to date information by logging out and back in or force closing.
- Charge the device for two hours
- After a couple of minutes, you will get an audible message. The message will help you determine the issue:
- “Device is charging”: Issue is resolved and you should see the app updating
- “Device is charging, there is no cellular reception”: Device is still not communicating, continue to step 5
- No message: Ensure audible indication volume in the app is up (this is the default) and reconnect to the charger. Contact us if you still do not get an audible message
- Try taking the device out in transit at least 1.5 miles outdoors away from charging location. This way the device can fully connect to local towers and GPS in the area.
- If the app is updating, continue using the device as usual (issue was limited cellular coverage at your charging spot)
- Otherwise, contact us providing as much information as possible
Advanced troubleshooting
Thank you for your patience as we work together to troubleshoot your issue!
Please first make sure your app is showing the most up to date information by logging out and back in or force closing.
Charging Issues:
- Be sure that the cable is inserted correctly. Charging the device
- Try charging in an alternate outlet
- Try charging with only the USB portion of the cord
- Try charging with an alternate charging cord
Basic Device Restart:
*Note that it is OK to remove the sticker on the device and remove the battery (as detailed below). This will not void the device warranty, as you are troubleshooting.
- Take the battery out of the device
- Try to carefully clean the four golden ports in the device with a soft cloth
- Put the battery back in and replace the cover
- Plug the device in.
- Wait for a few minutes and verify that you get the audible indication of charging, “Device is Charging”
- If your device does not power on, please move on to the next advanced steps.
- If your device does power on, please take the device out in transit to give it a chance to gain cellular and GPS signals and communicate. If your device does not gain communication, please move on to the next advanced steps.
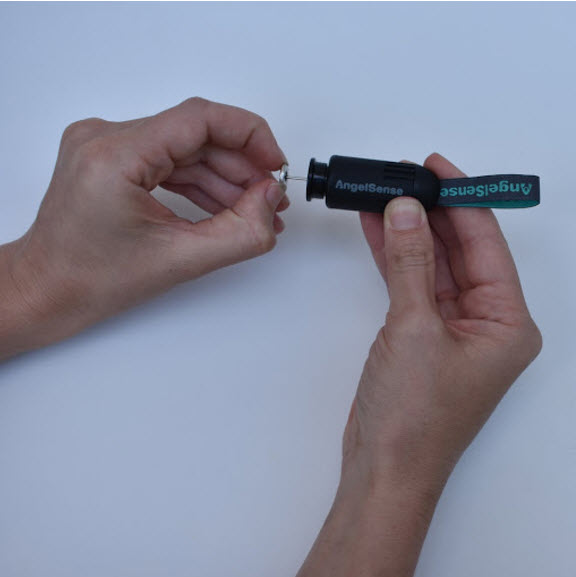
Removing the battery
Open the back cover. This may take some force to get the back off as it is very tightly secured.

Take out the battery.

Gently clean the metallic contacts with a soft cloth.
With the metallic contacts of the battery facing the metallic contacts in the battery slot, press the battery down until it locks into place. Replace the back cover.

Activating a replacement
Once you receive your replacement AngelSense device and have charged it for 4 hours, Primary Guardians can activate it in the AngelSense app.
*Please activate your replacement device as soon as you receive it in order to avoid a lapse in coverage. After 7 days, the inactive device’s cellular line will automatically be suspended.
1. Go to the Menu on the left hand side and click “Settings” and “General”
- Use the magnetic key to remove the fasteners from the protective sleeve (we recommend attaching the fasteners to the sleeve when not used to avoid losing them). See: “How do I detach the device from my child’s clothes?”
- 2. Look at the back of your AngelSense device for the device’s ID number and select it in your app. Click “Save”.
-
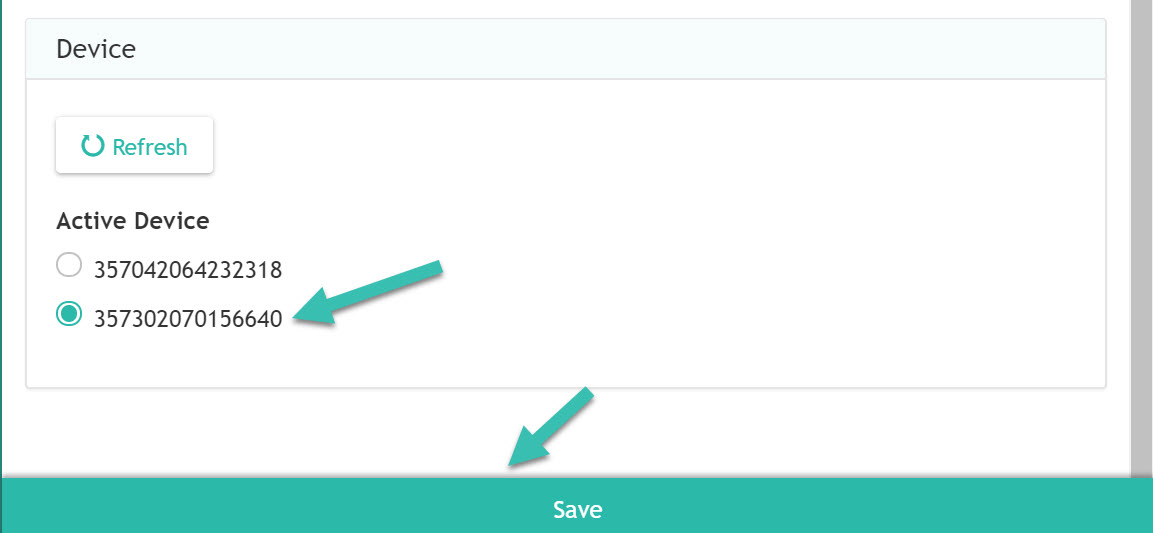
- 3. Try taking the device out in transit at least 1.5 miles outdoors away from charging location. This way the device can fully connect to local towers and GPS in the area.
Cannot connect to Wi-Fi
The GPS 3 device has the capability to connect to WiFi.
Some reasons for being unable to connect to a WiFi network could be:
- Incorrect password
- Poor cellular reception on the device
- Poor WiFi connection
Some things that you can try are:
- Configuring your WiFi from a different location, where there is better cellular reception for the device. Device Status
- You can try restarting the WiFi router
- Connecting your device to a phone’s Hotspot in a location where the device has better cellular reception. Then, use the connection to the Hotspot to maintain communication on the device. Once Home, connect to your Home WiFi network.
- Try restarting the device
If you continue to have issues, please contact us at support@angelsense.com if you still are unable to connect your GPS 3 to WiFi.
NOTE: The GPS 1 device does not support Wi-Fi.
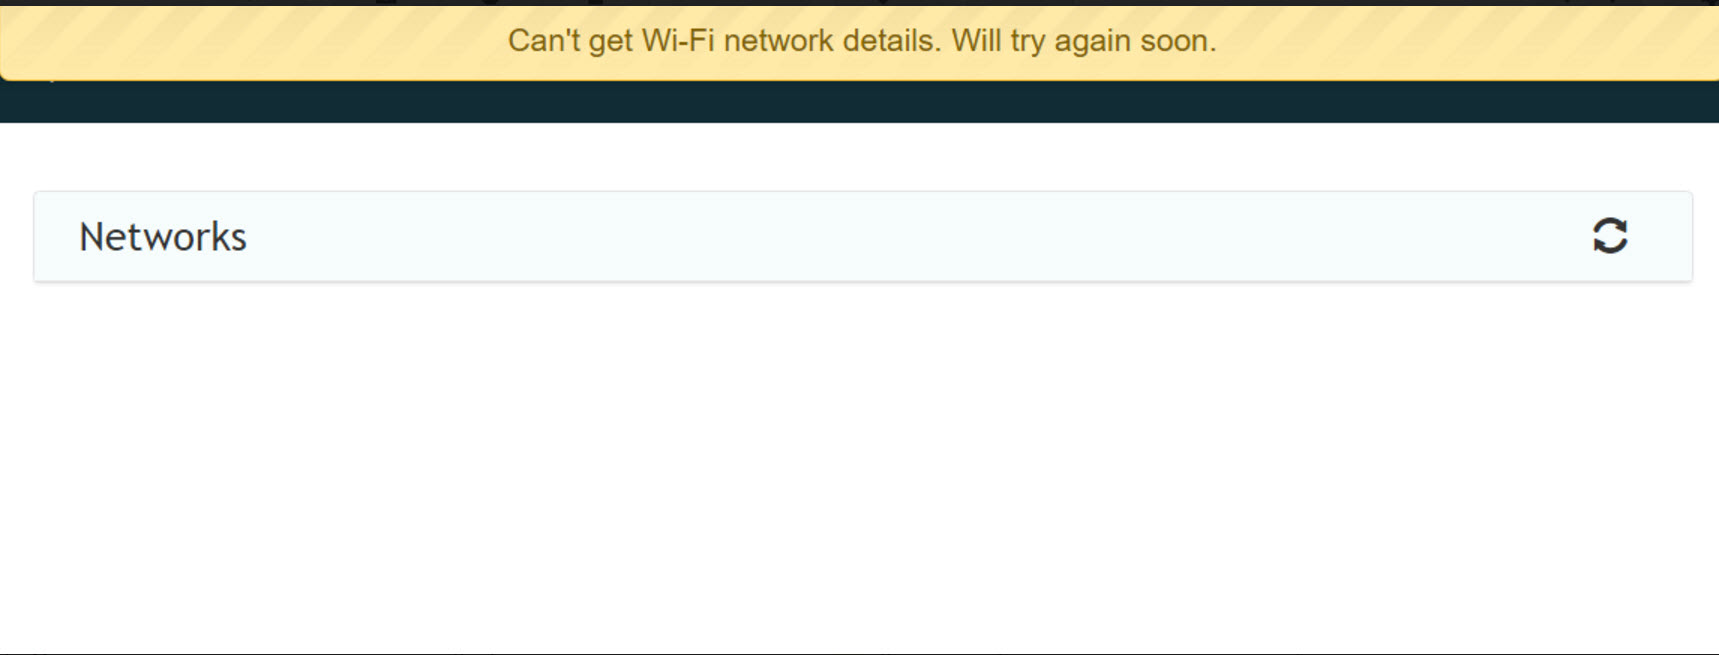
Wi-Fi Networks not loading
If you get this error message or when you attempt to connect to a Wi-Fi network it does not do so, it means one of two things:
- The signal strength for any Wi-Fi networks are not sufficient enough to be detected.
- You can try pressing the refresh button in the upper right.
- Your device currently has insufficient cellular reception.
- If your device is showing “No Signal” it will be unable to update with any nearby Wi-Fi networks due to the device being unable to communicate with your app.
- In order for Wi-Fi networks to be helpful during times of “No Signal”, the password will have to have previously been provided for the Wi-Fi network.
- Please see Connecting GPS to Wi-Fii for the device to be able to connect to this network in the future to help with times of “No Signal”.
NOTE: The GPS 1 device does not support Wi-Fi.
Handling water damage
What can you do if your device accidentally goes through the washing machine or your child jumps into a pool?
The device’s warranty will unfortunately be void if this happens, but there are some steps that you can take to try and salvage it.
Try this:
- Take the device out of the water as soon as possible.
- Dry the outside of the device.
- Take the device out of the sleeve and remove the Silicon cover.
- Take the battery out.
- Put it in a sealed bag with uncooked rice. The rice will absorb the humidity left in the device.
- Leave it there for at least 24 hours, but the longer the better.
- When putting the device back together, make sure there are no dust particles, etc.
- Put the device back to charge.
- If you hear any unfamiliar sounds unplug the device.
- If everything looks (and sounds) fine, try sending it out with your child.
This has worked for some users in the past so it is worth trying, but we cannot guarantee that it will work. See our Waterproof Options!
If your device does not regain communication after having done these steps above, charging, and taking out into transit, then a replacement device will need to be purchased. See: How to purchase a Replacement Device.
- The signal strength for any Wi-Fi networks are not sufficient enough to be detected.