» BackGetting Started GPS4
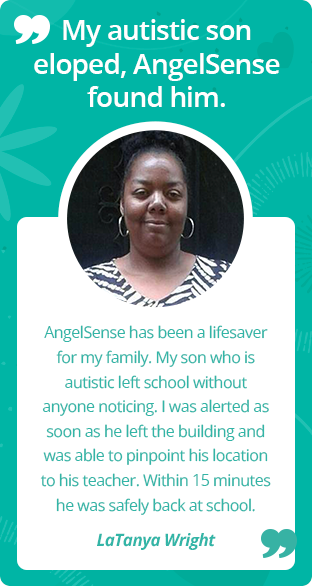
Welcome to AngelSense!
Step 1: Charge the device: When connecting the device to the charger it should turn on automatically, with the red LED light blinking while it is gaining a charge and solid once it is fully charged. It will take approximately 2 hours for a full charge of up to 24 hours (depending on usage).
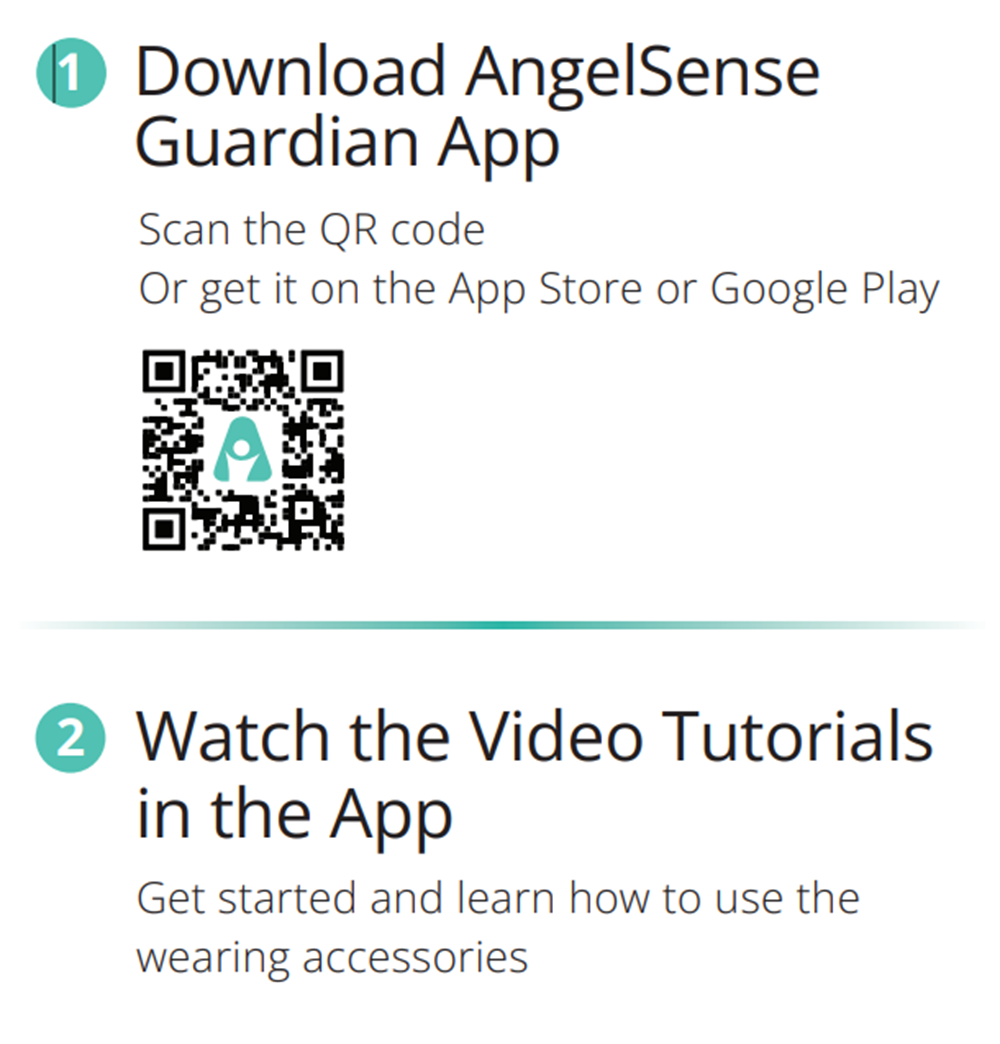
Step 2: Download the AngelSense App.
Step 3: Log In to the AngelSense App for further guidance.
Step 4: Place near a window or go outside to get location updates to your app.
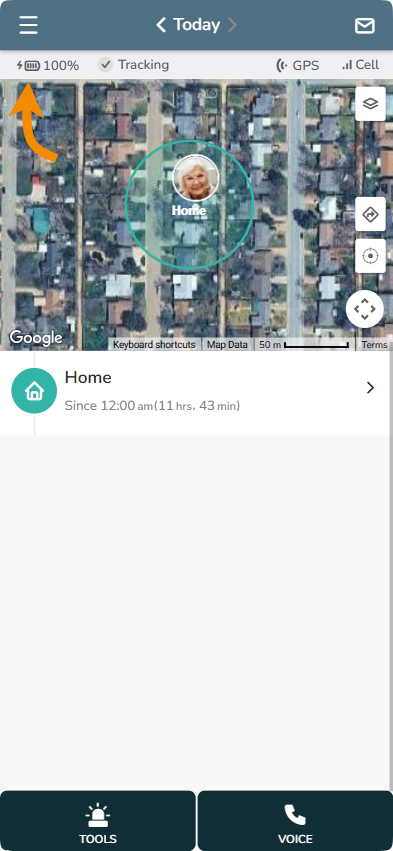
Step 5: As soon as your device is charged and turned on, take the device out in transit at least 1.5 miles outdoors away from the charging location. This way the device can fully connect to local towers and GPS in the area. You can then watch your app for prompts with further guidance. Geo-fences are created automatically in AngelSense! You can personalize your locations by renaming the places.
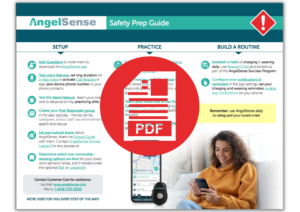
Download and print out this step by step guide, which takes you through all the AngelSense features so that you are prepared in case of an emergency. Keep it handy as a reference guide and give it to others that you have added to the app (Grandparent, teacher, caregiver).
Charging & Turning on
The GPS 4 device is charged with a magnetic charger. It takes about 2 hours to recharge the battery. The device automatically powers on when it is plugged in.
To charge the battery:
- Connect one side of the USB charging cable to the wall charger and the magnetic connector to the device.
- Charge the device near a window with good cellular reception, so that data can be regularly transmitted to the app. While connecting, the relevant LED blinks.
- Ensure that the device is charging:
- The red LED light on the device will blink and when fully charged it will stay on.
- You will hear an audible voice say “device is charging” when you plug it in.
- The battery in the app status bar should be green with a lightning bolt by it.
Note:
The device’s charging port is not under warranty.
We suggest keeping the device charging when not in use. It is best to keep the device charged instead of letting the battery run out.
To turn the device off, if needed, use the app shutdown feature.
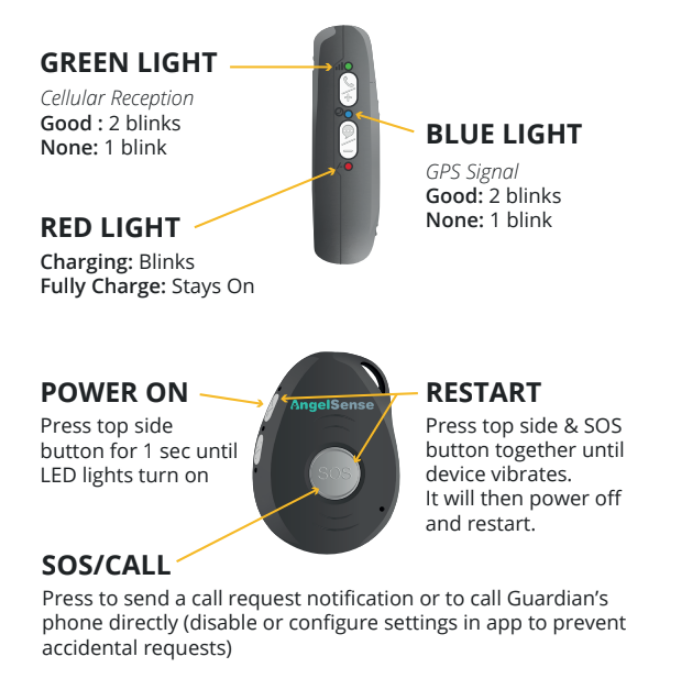
Device Status Indications
Watch video to see what all the buttons and lights mean:
Device Lights & Buttons Quick View:
Preserving Battery Life
With the New & Improved AngelSense you can experience an improved Battery Life of up to 24 hours (depending on usage).
To provide maximum protection for your loved one, AngelSense offers several life-saving features that require a bigger battery and regular charging. To make sure your battery lasts as long as possible, here are some tips:
- Name Places – Learning your routine takes extra power, help out by naming and customizing geofences
- Assure Place Borders are Large Enough – This also helps decrease false alerts
- Use Certain Features Moderately – Runner Mode, 2-Way Voice, and 1-Way Voice use extra battery power
- Charge Device Fully – Leave connected to the charger until ready to use
Some more about the battery:
- The battery lasts up to 24 hours with normal use after a full charge (2 hours)
- Poor cellular reception depletes battery more quickly
- After the first 2 weeks of use, you should automatically see improved battery life
Note: Battery usage of the device is not affected by keeping the app open or receiving notifications.
Technical Guidance
Thank you for your patience as we work together to troubleshoot your issue!
- Please first make sure your app is showing the most up to date information by logging out and back in or force closing.
- Restart your device
Charging Issues:
- Be sure that the charger is correctly positioned on the magnetic charging port.
- Try charging in an alternate outlet
- Try charging with only the USB portion of the cord
- Try charging with an alternate charging plug, if available
If your device does power on, please take the device out in transit to give it a chance to gain cellular and GPS signals and communicate. If your device does not gain communication, please contact us at support@angelsense.com once all of these steps above have been taken.
App Overview